We’re back again for another exciting installment in everyone’s favorite “photo how to” blog series, Cliché Classics! It’s where I explore some well-trod photographic ground and add a few more boot tracks because… well, I have the time.
And we’re all stuck at home.
And I need to do something, anything, besides observe the fourth video conference meetup of the week for my child’s elementary school classroom. I know what you’re thinking, “Listening to 25 third graders simultaneously attempt to express themselves while asking their teacher how to work their respective mute buttons must be productive, informative, AND engaging.” You would be mistaken.
Sooooo, let’s have a go at this photography thing shall we?
You’ve heard the old saying, “Oil and water mix about as well as big cat ownership and tasteful home decor.” (I have a feeling this joke will age very, very well.) Salad dressings aside, the combos’ antipathy for one another does provide some keen photographic opportunities when you add a little backlit color into the mix.
The Setup
To get started with this project, you’ll need a few things you’re likely to have around the house:
- A camera and lens. I used my Canon 6D and 100mm macro lens. A macro lens (or a regular lens paired with extensions tubes) is probably the best choice for this project as you can enlarge the bubbles in your frame as much as possible. If you don’t have a camera and a lens, I’m not sure why you’ve read this far.
- A tripod with a head where you can position the camera pointing straight down.
- A flat pan or dish with a glass bottom.
- A tablet or a decent-sized smart phone.
- A couple of hard cover books.
- Oil and water. I used vegetable oil as it was the clearest colored oil I had on hand.
I know in the last blog post, I made a pinky swear that I would take a picture of the setup for any future Cliché Classics, but who really pinky swears anymore? I’m a middle-aged man not a 7-year-old girl, so isn’t it really your fault for believing I would remember in the first place? Since that’s settled, you’ll have to accept yet another crudely photoshopped version of what I had set up on a dirty counter-top professional posing table in my kitchen deluxe home studio.

First, I googled “colorful backgrounds” on my iPad which provided quite a selection of images I could use as my backdrop. Then, I took my 9×13 glass baking dish and poured a thin layer of tap water, covering the bottom of the dish to which I added a few tablespoons of vegetable oil.
I propped up the dish between the two books, making sure to leave some room underneath. I displayed the image I selected from my Google search full screen on the tablet, and made sure its brightness setting was cranked as high as it could go. Then I took the iPad and placed it underneath oil/water/baking dish bridge.
With my camera on my tripod, I angled the lens so it was pointing straight down into the baking dish. I took a mini-whisk and mixed up the oil water combo until some nice bubbles appeared. After getting an acceptable bubble to water ratio, I pre-focused my lens on the bubbles and turned off the autofocus. With autofocus consistently on, sometimes the lens would try to pull focus on your background instead of the bubbles.
At that point all I had left to do was, whisk, shoot, and repeat.
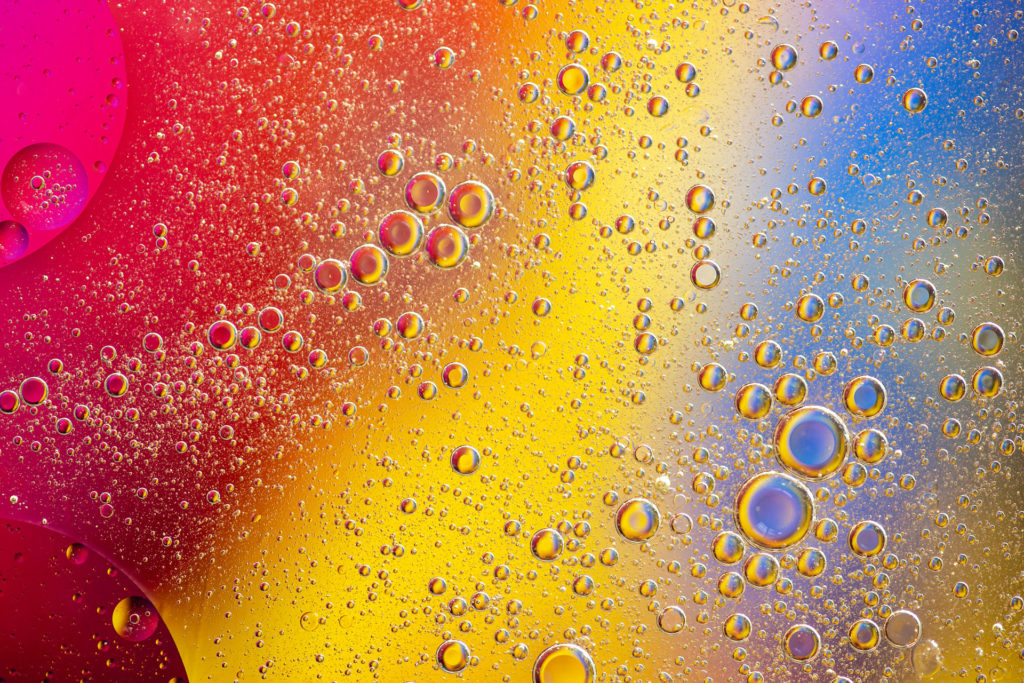
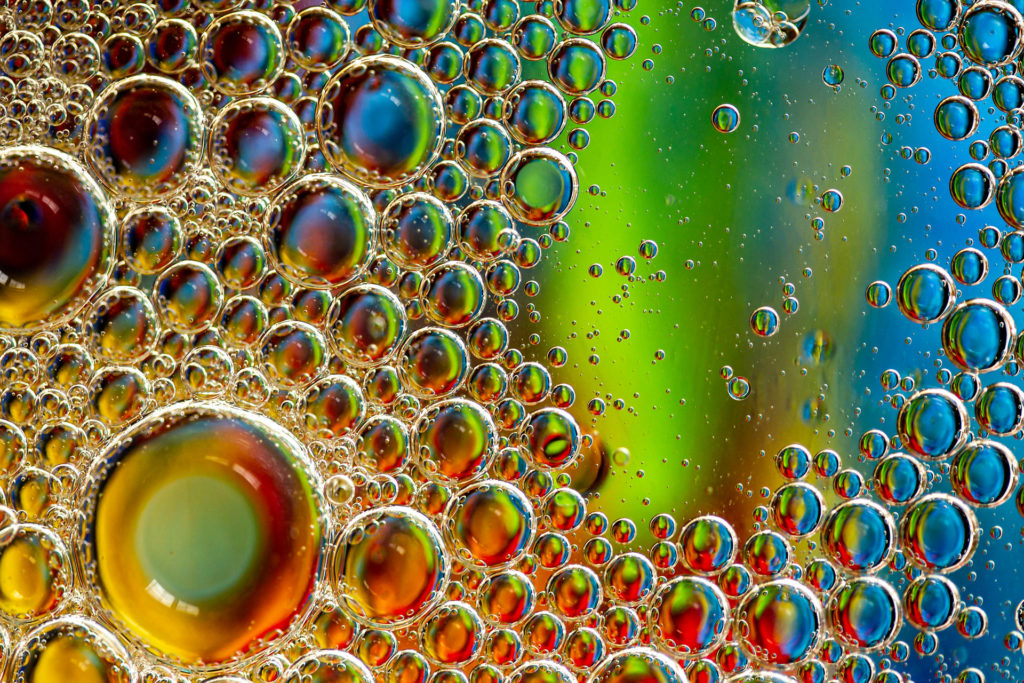
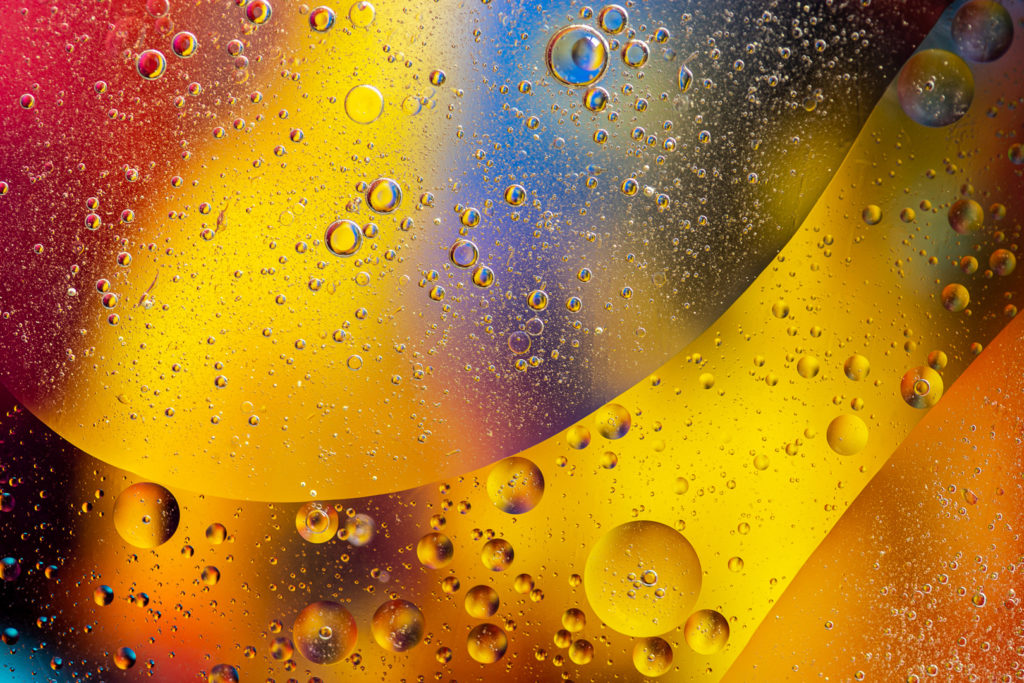
The Results


Things I Learned
- Don’t go all Gordon Ramsey whipping those bubbles. The harder you stir, the smaller the bubbles get. They aren’t as photogenic and the background color doesn’t come through as well when the bubbles are super tiny.
- Don’t stop your lens down too much as you want to throw that background out of focus as much as you can, but you probably want to go a little smaller than I did at f/2.8. Unfortunately, I was limited because of a busted aperture unit on my macro lens which will not let me stop it down.
- Have a couple of different background options available to change up your color palette. I got lazy and tried to use the same background (which did have a wide variety of colors on it) by moving the iPad around under the baking dish. Unfortunately, it was tricky to get it in the right spot before I lost the best bubbles. It would have been easier if I had other differently-colored backgrounds to swipe through at the ready.
The Verdict
I think my first pass at the Oil and Water Cliché Classic produced some acceptable images. With some tinkering to the process and more background choices, I think I could produce a wider range of compelling shots the next go around.
I give this photography project a 7 out of 10 on the better than a third-grade video conference scale.
You might also like


Leave a reply